

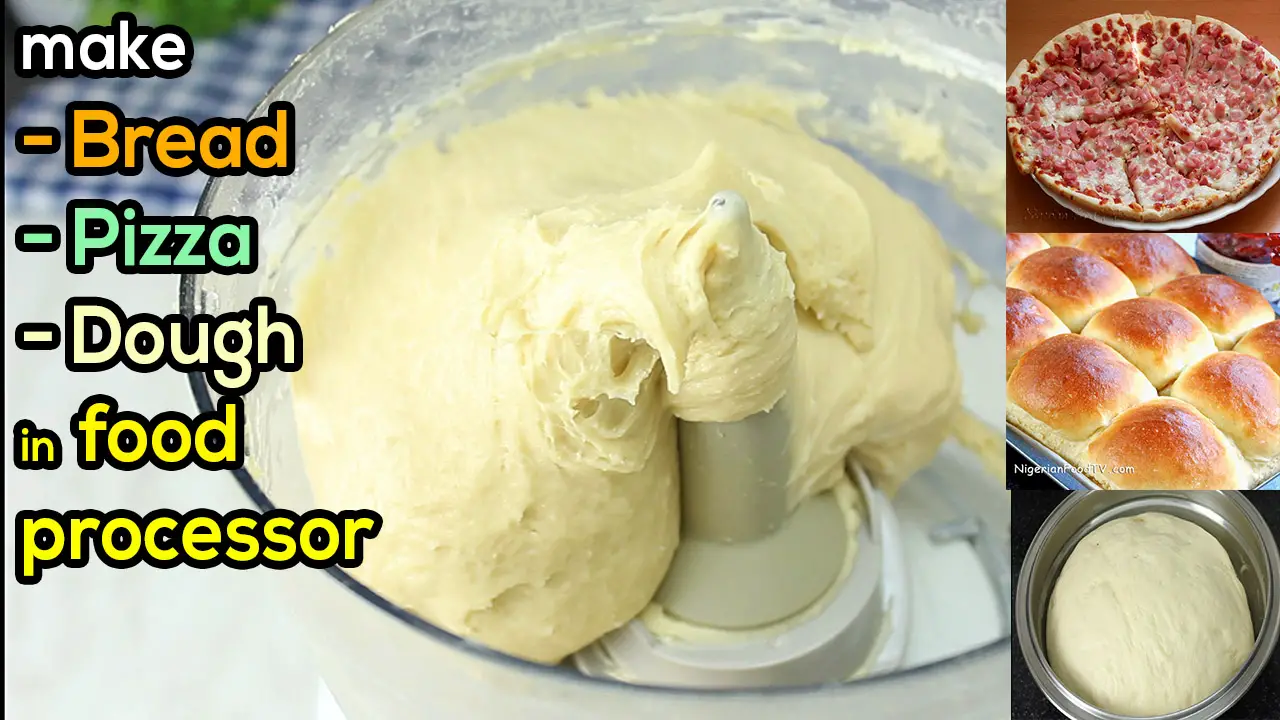
Say bye bye to sticky hands and
Hello to effortless dough making in a food processor:
Make Pizza and Bread dough in a snap.
Are you tired of kneading dough by hand or don’t own a stand mixer? Have you ever dreamt of effortless pizza and bread-making without the sticky hands and laborious kneading? You’re in for a treat.
If you don’t own a stand mixer, believe me, it’s as easy as it looks. No more sticky hands and arm exercises just to make a loaf of bread or pizza.
In this comprehensive post, I’ll walk you through the process of kneading dough for pizza and bread in a food processor. Plus, I’ve added some frequently asked questions (FAQs) , as well as extra tips to make your dough-making process even more seamless.
I’m using a food processor with about 650-wattage power, and it comes with two blades: a plastic dough blade and a metal blade. Even though the plastic blade was made for this purpose, it seems to leave the dough stuck to the corners of the bowl instead of kneading it. So, I use the metal blade, which does a better job.
You’ll be amazed at how easy it is to achieve that heavenly dough with minimal effort. So here is how to Knead dough in food processor
Ingredients:
- 2 1/2 cups of all-purpose flour
- 1/4 cup of sugar
- 1 1/4 tsp of instant yeast (or 10.63 grams of fresh yeast)
- 1/4 tsp of salt
The Step-by-Step Process to make dough in a food processor:
1. Select the Right Blade:
Begin by ensuring you’ve attached the metal blade securely in your food processor, following the manufacturer’s guidelines. This blade is key to achieving perfectly kneaded dough.
2. Mix the Dry Ingredients:
In your food processor, combine the flour, sugar, yeast, and salt. The food processor will effortlessly create a homogeneous mixture in no time.
3. The Initial Pulse:
Give your machine a quick pulse for about 5 seconds to ensure the dry ingredients are thoroughly mixed. This is the foundation of your dough.
4. Add the Liquid Ingredients:
As your food processor continues running, gradually pour in the whole egg and cold milk or ice-cold water. The cold temperature is crucial for preventing yeast from being compromised by heat and ensuring your dough’s success.
5. Achieve a Smooth Mixture:
Continue processing until your dough is well combined and no dry flour remains in the bowl, usually taking about 8 to 10 seconds.
6. Autolyse for Perfect Texture:
Let your dough rest in the food processor for 10 minutes. This resting period, known as “autolyse,” is a secret to achieving incredible texture and flavor in your pizza or bread.
7. Butter, Margarine, or Oil Addition:
After the autolyse period, introduce the melted butter, margarine, or vegetable oil to the dough in the food processor. This is where the dough’s transformation begins.
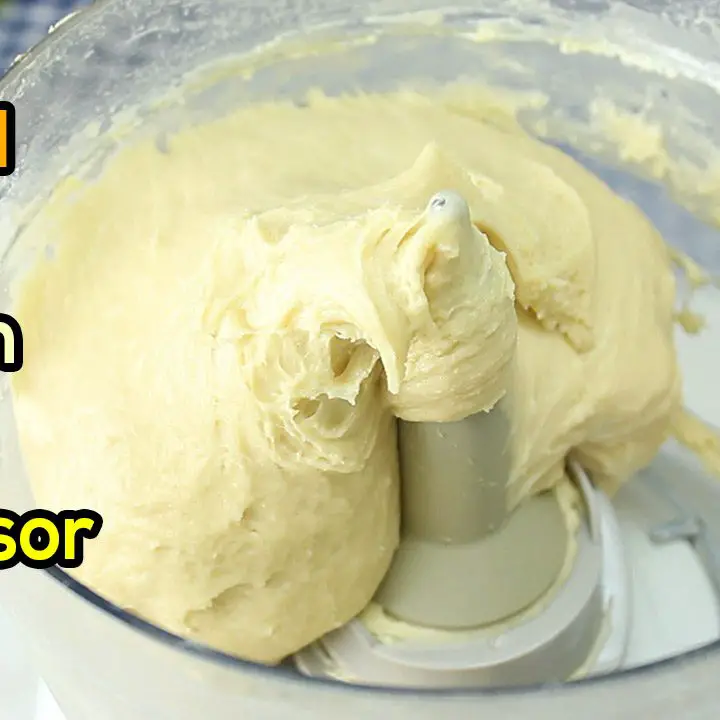
8. Kneading to Perfection:
Continue processing until the dough forms a satiny, sticky ball that clears the sides of the bowl. Remember, don’t over-knead; approximately 40 to 60 seconds should suffice.
9. Transfer to a Bowl:
Move your perfectly kneaded dough into an oiled or buttered bowl, you can knead for an extra minute if you prefer, but this is optional
10. Shape and Bake:
Now that your dough is ready, mold it into the desired shape for your pizza or bread. From here, it’s a breeze to proceed with your favorite recipes. Bake your creations to perfection and savor the results of your effortless dough-making adventure.
Click here for recipes you can make with this method
Frequently Asked Questions (FAQs):
Q1: Can I use whole wheat flour instead of all-purpose flour for my dough?
A1: Yes, you can! While whole wheat flour may require a slightly different liquid ratio, it’s entirely possible to create whole wheat pizza and bread dough using this food processor method. Experiment and adjust as needed.
Q2: Is it necessary to use cold milk or water for the liquid ingredients?
A2: Yes, it’s important to use cold liquid to prevent the yeast from being affected by heat. The cold temperature ensures a successful rise.
Q3: What can I do if I don’t have a food processor with a metal blade?
A3: If you don’t have a metal blade, use the one that comes with your food processor and monitor the dough closely. However, the metal blade is recommended for better results.
Q4: Can I store the dough for later use?
A4: Absolutely. Once your dough is kneaded, you can store it in an airtight container in the refrigerator. Just make sure it’s well covered to prevent it from drying out.
Additional Tips:
- Don’t rush the autolyse process. Allowing the dough to rest is a game-changer for texture and flavor.
- Keep an Eye on Consistency: Pay attention to the dough’s consistency during processing. It should form a satiny, sticky ball that clears the sides of the bowl.
- Experiment with Flavors: Feel free to add herbs, spices, or other flavorings to your dough for a unique twist on your pizza or bread.
Now you know how to Knead dough in food processor , you can now enjoy homemade pizza and bread with a texture and flavor that will leave everyone in awe. Say goodbye to the hassle of kneading by hand and embrace the convenience of your food processor for making delicious, homemade delights. Happy baking!
knead dough in food processor in 5 minutes: Make Pizza Bread DOUGH in 60 SECONDS | no STAND MIXER | no HAND KNEADING | FAST AND EASY
Dough-kneading made easy with a food processor. Perfect pizza and bread in a snap! Learn how to knead dough effortlessly using a food processor.
Materials
- Food Processor
- 2.5 cups of all-purpose flour
- 0.25 cup of granulated sugar
- 1.25 teaspoons of instant yeast (or 10.63 grams of fresh yeast)
- 0.25 teaspoon of salt
- 1 whole egg
- 0.25 cup of cold milk or ice-cold water
- 80 grams of melted butter, margarine, or vegetable oil
Instructions
1. Attach the metal blade as per the manual instructions.
2. Combine the following dry ingredients in the food processor: flour, sugar, yeast, and salt.
3. Start the food processor to mix the dry ingredients for about 5 seconds.
4. While the processor is running, add the following liquid ingredients:
- A raw egg
- A quarter cup of cold milk or ice-cold water
5. Continue running the food processor until the dough is well combined and there are no dry flour patches left. This usually takes around 8 to 10 seconds.
6. Let the dough rest in the food processor for 10 minutes. This resting period is called autolyse and improves the dough's texture and flavor.
7. After the autolyse, add about 80 grams of melted butter, margarine, or vegetable oil to the dough in the food processor.
8. Process the dough in the food processor until it forms a satiny, sticky ball that clears the sides of the bowl. This typically takes about 40 to 60 seconds. Avoid over-kneading.
9. Transfer the kneaded dough into an oiled or buttered bowl. knead for an additional minute if desired, although it's noted as not necessary.
10. Mold the dough into the desired shape for your pizza or bread.
11. Bake the dough as needed and enjoy your homemade pizza or bread.
Notes
- Use cold milk or water when mixing the dough to cool down the food processor and to prevent the yeast from getting killed by heat).
- Don't rush the autolyse process. Allowing the dough to rest is a game-changer for texture and flavor
- Pay attention to the dough's consistency during processing. It should form a satiny, sticky ball that clears the sides of the bowl.
- Feel free to add herbs, spices, or other flavorings to your dough for a unique twist on your pizza or bread.
Other recipes you’ll also like:
. I Drink This 3X Times a day TO LOSE BELLY FAT FAST | NO DIET| NO EXERCISE | STOMACH fat burner drink
. NIGERIAN PANCAKE RECIPE
. HOMEMADE DRINKABLE YOGURT
. SAUSAGE BREAD ROLLS
– Jollof Rice Recipe – https://www.youtube.com/watch?v=9TvkeYNIRW4&list=PLFqGQKQamy-AVmrM2jqQhF0PXmTiGTfPP
– Plantain Puff Puff- sweet spicy Ripe Plantain puff puff (plantain buñuelos de platano) https://www.youtube.com/watch?v=EWcxs7UTRKc&list=PLFqGQKQamy-CNsmbdRDI16h3WXGkloyPa&index=2
– Easy Tasty OVEN GRILLED(roasted) FISH with Veggie sauce
– Nigerian Sausage Rolls
– Nigerian Crunchy Buns – easy nigerian buns recipe
– Nigerian puff puff – Easy authentic recipe (Bofrot)
• How to gain weight at the right places for skinny people
• How to make potato pancakes
•EASY CHICKEN STIR FRY
•How to Bake Cake in A Pot Without An Oven
•Easy Condensed Milk Toffee (simply irresistible)
• Homemade Samosa Wrappers ( Samosa dough)
• hOW TO MAKE YOGURT WITH MILK POWDER
You might also like these related recipes
– Nigerian Fish rolls
– The best Peppered snail sauce
– Asun goatmeat sauce recipe
– Nigerian Suya
#nohandkneading #nostandmixer #breaddough #foodprocessor #bread #pizza #kneaddough
